Google Tag Manager Configuration
Note
This part is only useful if you enabled GTM in the extension’s configuration, see Google Tag Manager.
You’ll need two tags so our extension can work with GTM : Pageviews Tag and Events Tag
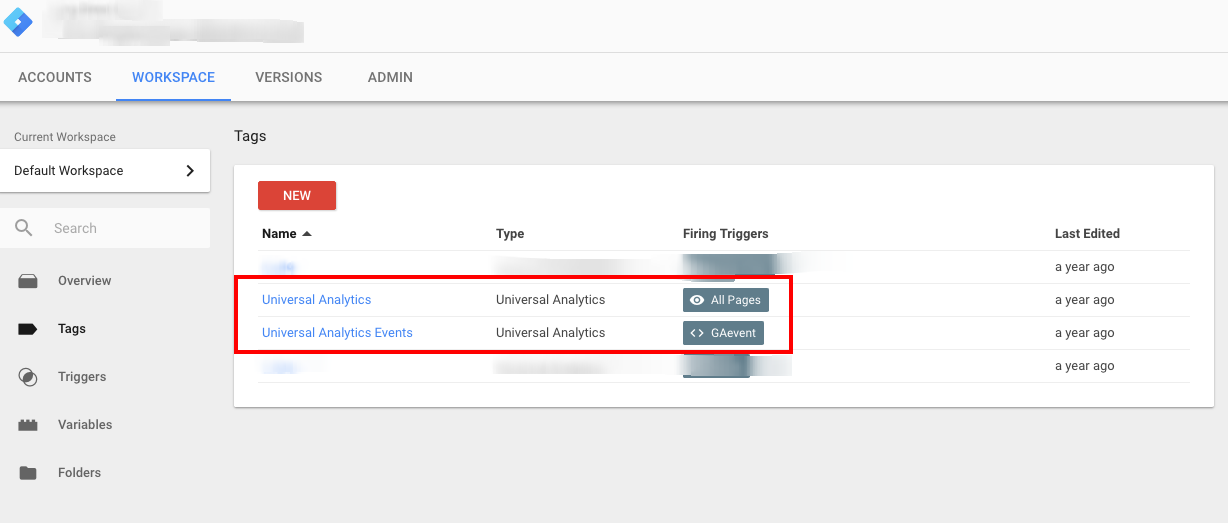
Pageviews Tag
Easiest first, the pageview tag. You just need to create a tag with this configuration :
Tag type : Universal Analytics
ID : Your GUA ID (UA-XXXXXX-X)
Hit Type : Pageview
Enhanced ecommerce checked and “Use data layer” checked. (Optional but recommended. Should match your GA/Magento’s configuration)
Trigger : All pages

Events Tag
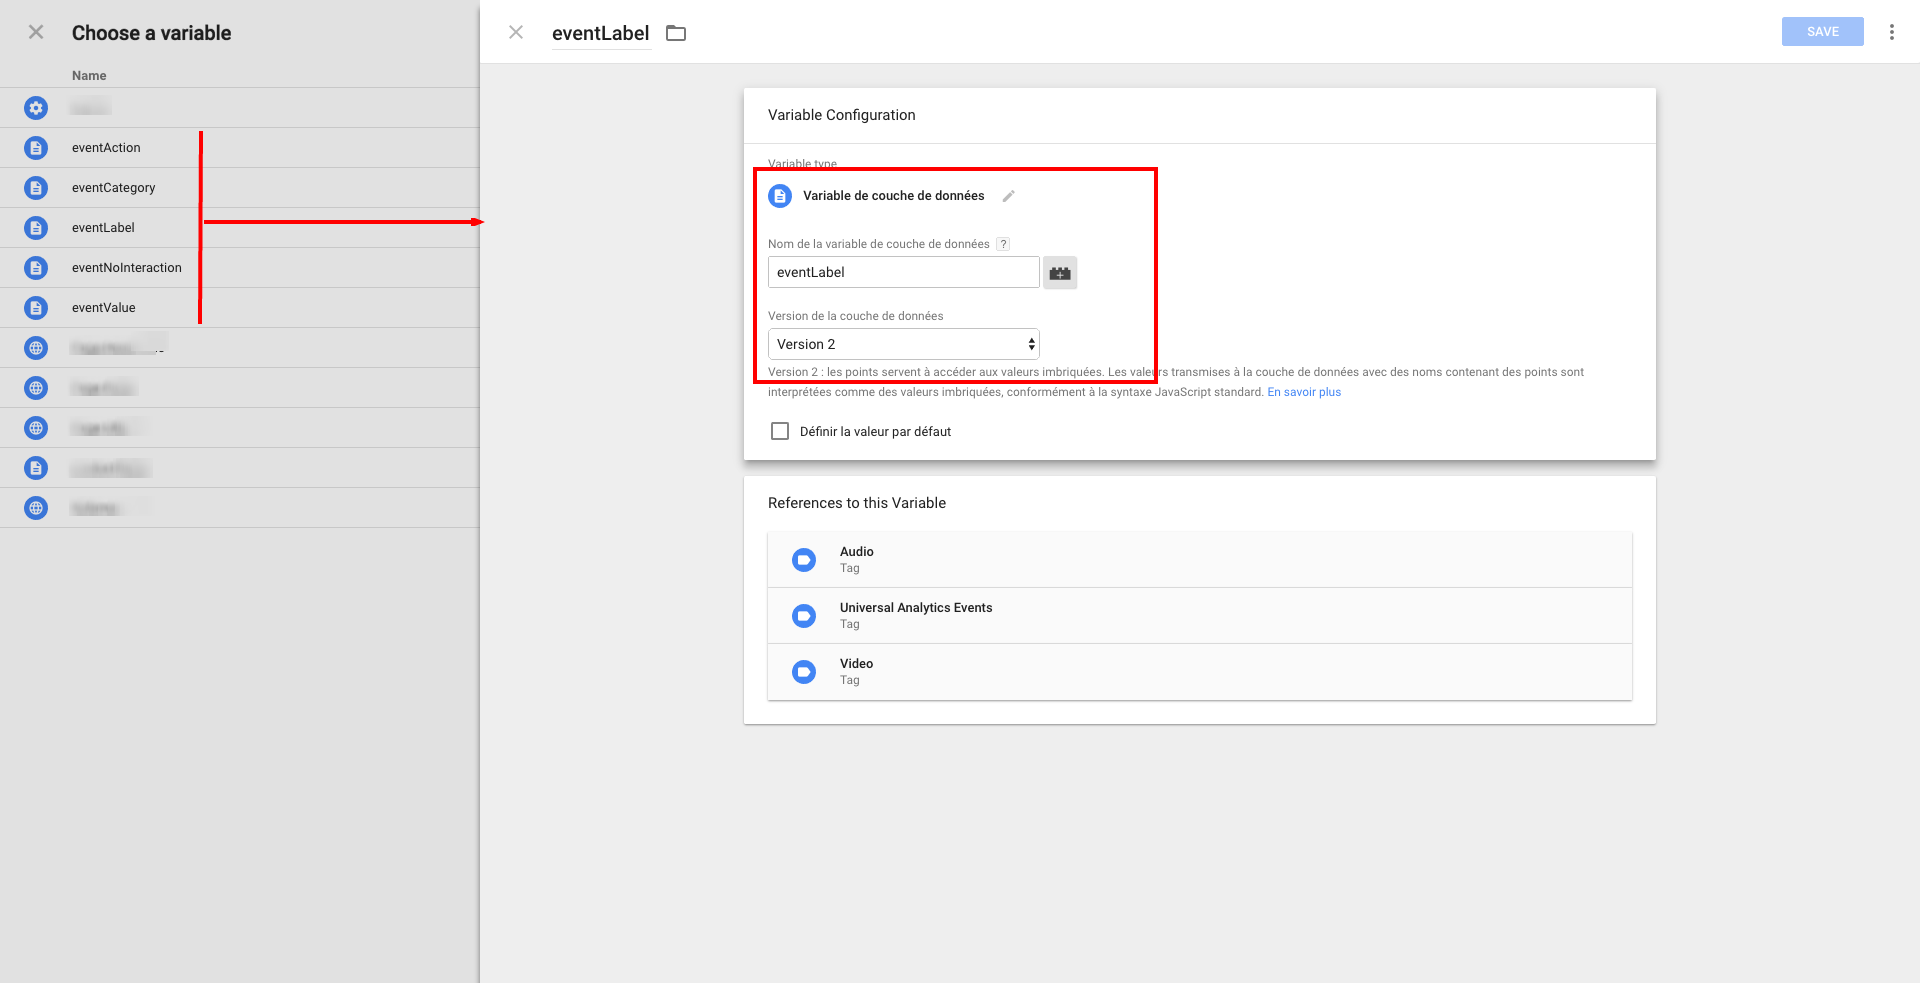
For this tag you will need to create data layer variables and a custom event.
Data layer variables are :
eventAction
eventCategory
eventLabel
eventValue
eventNoInteraction
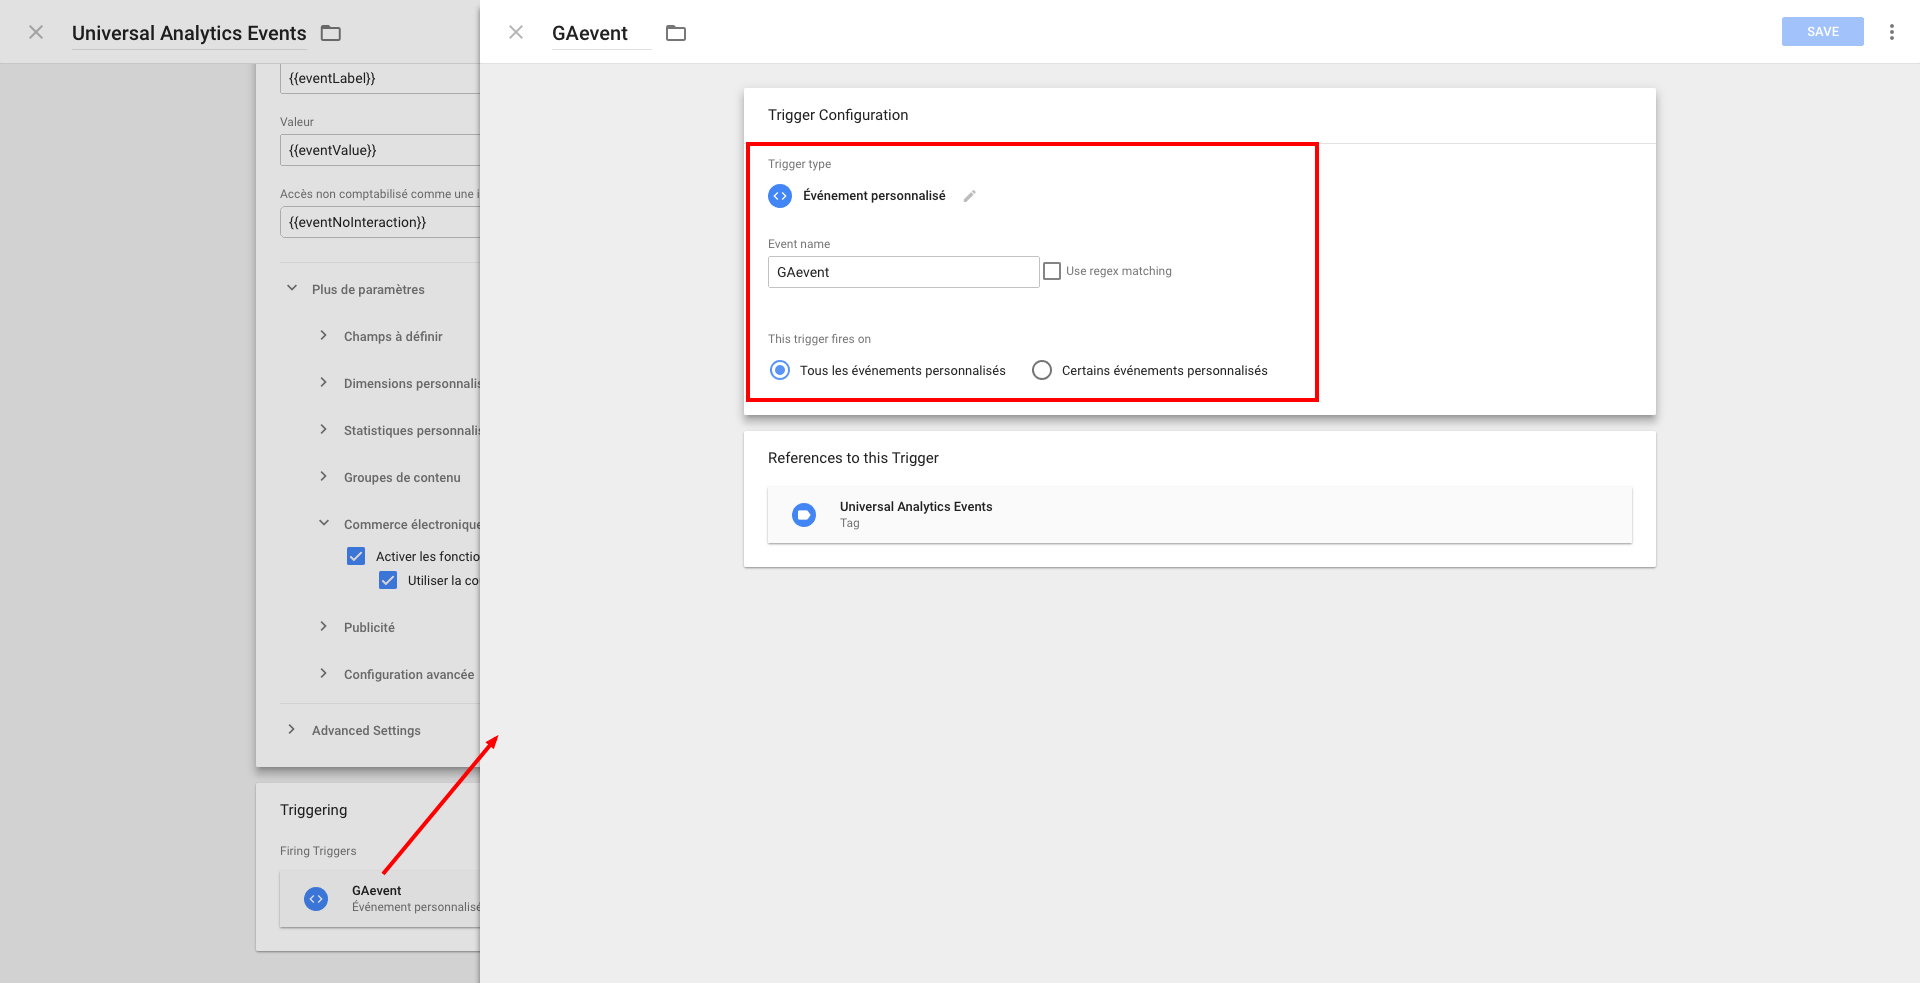
Custom event name is GAevent
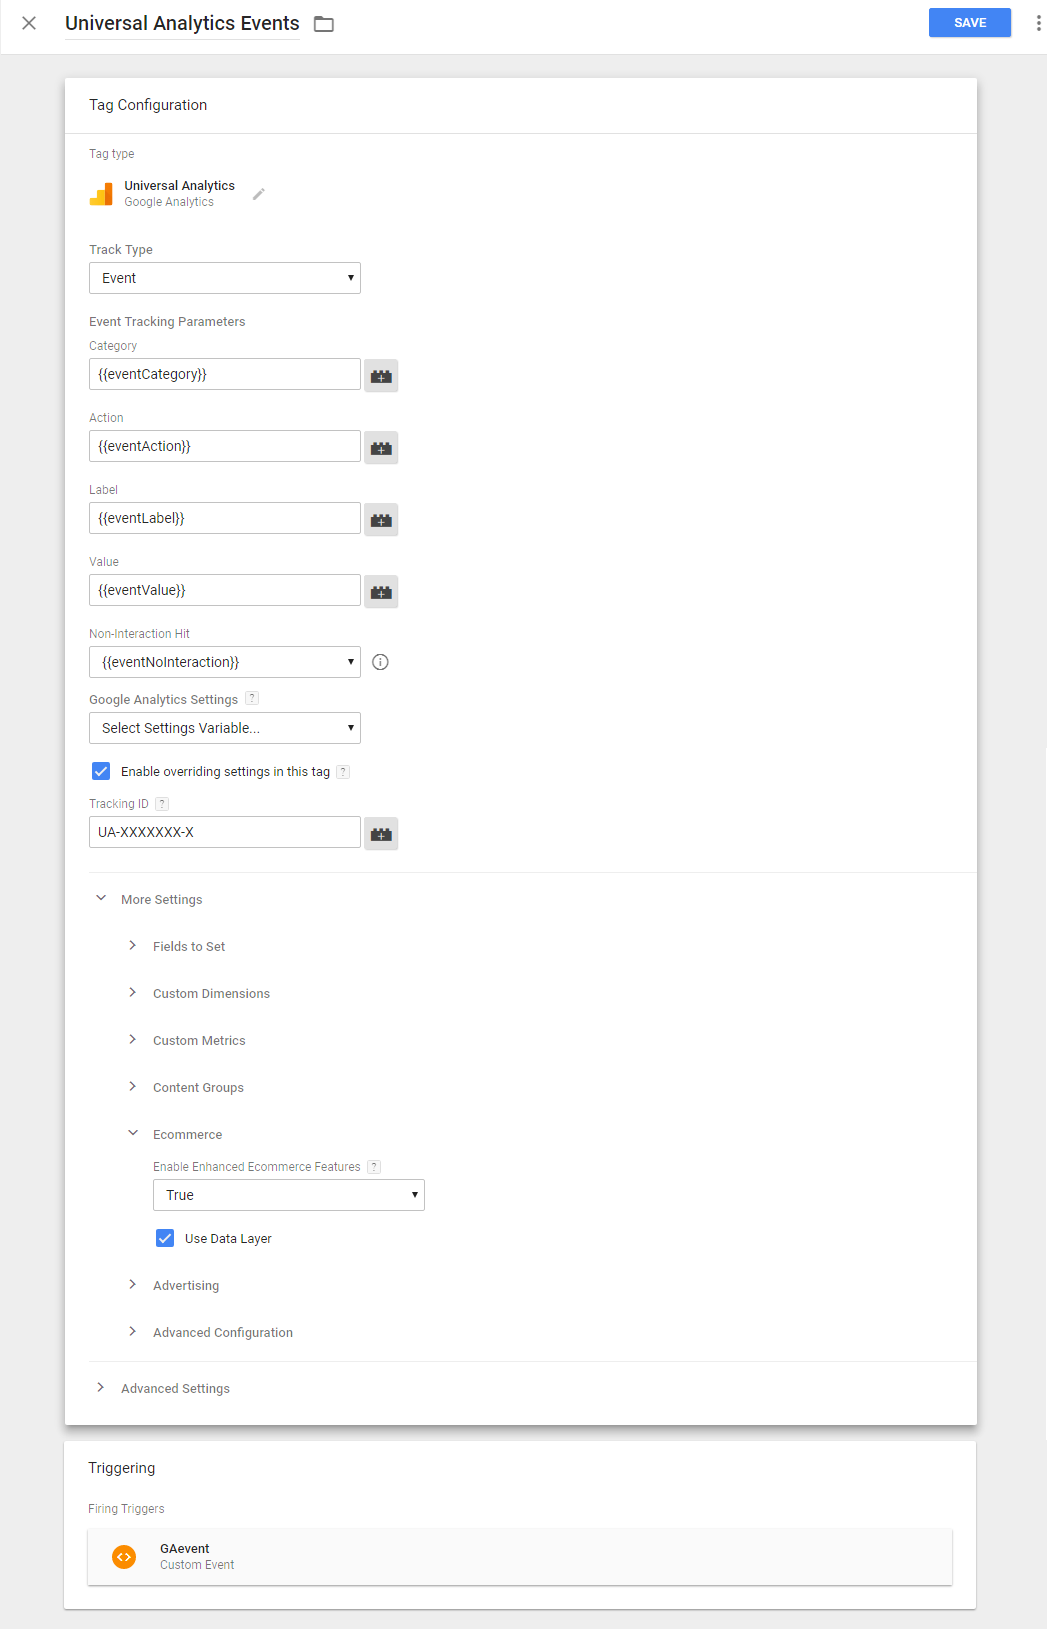
Once it’s done, you can create your GTM tag with this configuration :
Tag type : Universal Analytics
ID : Your GUA ID (UA-XXXXXX-X)
Category : {{eventCategory}}
Action : {{eventAction}}
Label : {{eventLabel}}
Value : {{eventValue}}
Non-Interaction Hit : {{eventNoInteraction}}
Enhanced ecommerce checked and “Use data layer” checked. (Optional but recommended. Should match your GA/Magento’s configuration)
Trigger : GAevent
Note
Don’t forget to save all your modifications and to publish before testing !